I've been working along on my new topography quilt, and thought I'd share a little bit about how I'm actually assembling all the layers.
This is the quilted background after I painted it. Don't fret about it's wretchedness, most of it will be covered up by layers. I only painted the middle sections because the paint does stiffen the fabric a little bit and I thought that might be helpful down the road.
Here you can see that I've strung about 30 pieces of flower wire through the quilt and back up to the top. In each case about 8" or so is sticking up. It took a fair amount of marking on each layer and on the base to get these in exactly the right spot to go through all the layers, but sadly I neglected to take a picture of that step. Each piece of wire has a plastic bead on it which will make the layers stay separated.
Here you can see that I've threaded the first layer (8000 feet) onto the middle section by poking the flower wire through the fabric layer. I've put another set of beads on in preparation for the next layer.
Here you can see I've paused midway through putting the fourth layer on so you can gen an idea of how it assembles. All those wires get kind of tangled up but are way easier to deal with than 30 threads going at once (how I did it last time) which was a nightmare.
And skipping ahead about 8 hours, here you can see that I've finished assembling all the layers on the middle section and have moved on to the next section. This whole process was a bit hard on the fingers, and the flower wire was a bit hard to poke through the fabric, but it worked. After building up all the layers, I threaded the ends of the wire back through to the back of the quilt, twisted the two ends together, and then buried the ends individually. That part took forever, and unfortunately I pulled some of the wires too tight and still have to go back and undo them so the front isn't crushed.
In any case, you get the idea! So far, I'm loving the way the layers ripple. Hopefully I'll get it finished soon since the show deadline which I'm aiming for is coming up quickly!
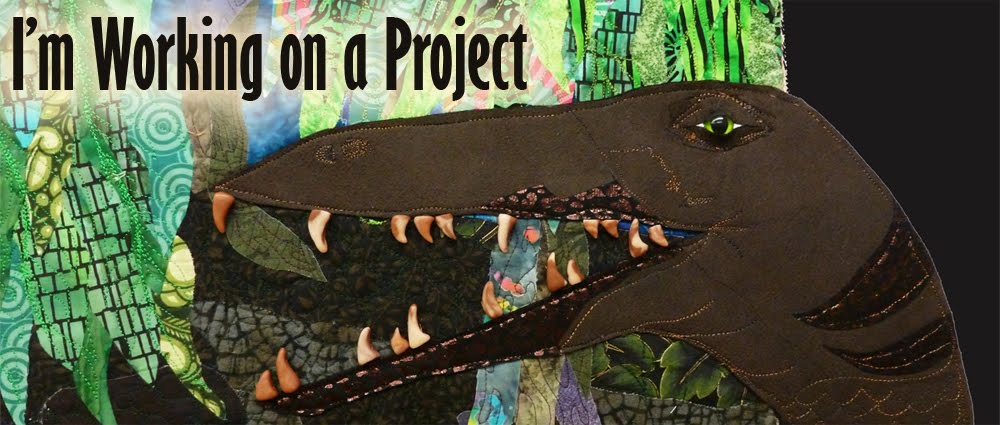
My patiently-waiting-long-suffering large Eucharistic Prayer C quilt is once again on the back burner while I work on something for an upcoming show deadline. Growing up we did tons of hiking in "our" mountains, more commonly known as the Lincoln National Forest/White Mountain Wilderness. We hiked with our parents, we hiked with all our friends (hi Tristan! and Chloe! and Lori!), we hiked with the girl scouts, we hiked with the ski team, we hiked with the dogs. Later on, we hiked with our boyfriends, and our parents' friends, and our cousins.
Though there were lots of trails, my favorite has always been the six mile trek between Monjeau lookout and the ski area- Crest Trail #25. It was beautiful, and fairly flat, and had fabulous rocks for climbing, and picnicking. Up above the trailhead at Monjeau was the fire lookout tower to climb up, and the ladybug bush. I have more pictures from hikes on this trail than any other, including almost a whole roll of "picturesque" shots of the trail 25 sign I took with my very first camera when I was about 8 years old. Anyway, before I write a book of hiking stories (remember that one time when....), I should get back to the point, which is the new quilt.
Back last fall, when I was working on my small topography quilt, it was really designed to be a technical exercise to work out how to make larger pieces based on an actual topo map. After having figured out some things that absolutely did not work (stiff interfacing between the layers) and some things that did (using painted remay worked great), I decided to start a bigger piece, and what better subject than Crest trail.
I began by working from 1:24,000 USGS topo maps of the area. I struggled with how to do it for a while- my original plan was to just get out my old White Mountain Wilderness map and trace the topo lines, but this turned into a huge disaster. Come to find out, you can actually download USGS PDF maps that can be opened in illustrator and have editable layers. Once you get them open in illustrator, the files are huge and have thousands (no exaggeration) of layers, so getting to a usable file was fraught. Added to that was the fact that my area of interest crossed over two of the maps, and I had a fairly challenging data management problem to solve. Anyway, I finally got my map pared down in Illustrator to the region surrounding Monjeau and the base of the ski area, and established 160 foot topo lines. Each topo line would outline a layer to be cut out and built up to create a 3D quilt. For precision cutting of the layers, I use my silhouette, but it's limited to 12 x 24, so I split the map into three panels. The topo lines go from about 7,800 feet to almost 11,000, and the tallest points (Buck mountain) have 18 layers in them.
After finalizing my map, the next step was quilting the base. I used remay on the front (since I wanted to paint it later to match the layers) and regular cotton on the back. I decided the quilt the topo lines into the base to help line things up later, so I printed out a full size version of my map on newsprint and taped it down. After quilting, I tore off the newsprint, and what a mess that was.
The next step was cutting the layers, and there were three separate silhouette cuts for each layer (elevation). That is, there was the 8000 feet layer for the left panel, the right panel, and the middle panel. It resulted in millions of little pieces, and to keep them all straight I printed out a page for each elevation so I'd know what pieces were supposed to be there. I had to pull in every table around to have space to spread everything out, and for several days everyone was banned from the studio lest small weird pieces float away. I painted all the pieces with latex and acrylic paint then let them all dry. The video clips below just show my studio filled with all the little pieces for each layer spread out on every available surface before and after painting (the sound is Star Trek, I'm rewatching TOS and it's a blast).
Next week I'll share more about how I'm assembling the layers, but because these pictures have been pretty boring, here's a peek (peak? hahah bad puns for the win) of what all the layers look like just piled up (i.e. without spacers and not stitched down to anything).
I'm linking up with Nina-Marie as always, I hope you're having a productive and creative week!
My friend Kristin gave me Karen Stone's New York Beauty book a few years back, and though I loved the pattern, I don't do much piecing anymore. My mom is a big piecer though, in her art quilts and bed quilts, and asked if she could have it. She's now been piecing scrappy New York Beauty blocks for the last three years or so. It's her travel project and she works on them in their 5th wheel whenever she and my dad travel together. Over Thanksgiving she thought she finally had almost enough blocks so we got them out to start auditioning layouts and to determine what colors she might need more of. It was pretty fun to put them all up, they really are pretty much every color, and I love love love the bright scrappy look.
It's really big, it'll finish at a generous king size, so I couldn't even get far enough back to get all the blocks in one picture. She had the most greenish ones so we started with that in the middle and worked out. It was fun to move them around and play with the organization. I think she needs about 14 or 15 more blocks and then has to piece the large borders, so it won't be finished any time soon, but it was great to see it coming together!
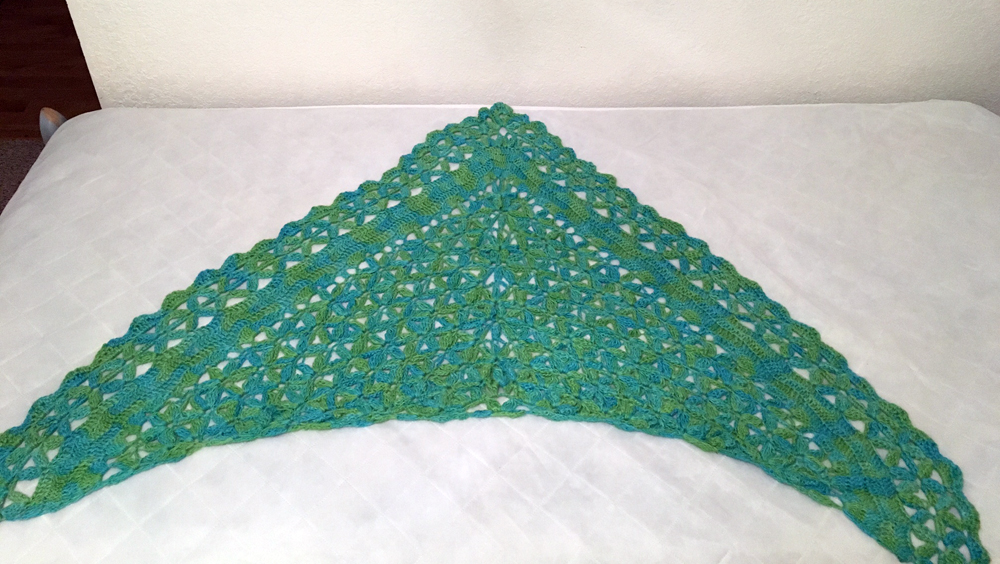
The road trip to my family's home in New Mexico is about 500 miles and though I used to be a car reader, I find myself frequently getting carsick on the trip now if I read too long. So it turns out that crocheting is a great way to fill the long drive. Having seen a couple of beautiful small shawls/triangular scarves (not sure where the crossover line is), I decided to crochet one.
I dyed some of my fabulous white alpaca yarn (thanks Aunt Susan!) and started to look for a pattern. I love searching on ravelry, and selected this one for purchase from the interweave store. I love all the free patterns on ravelry, and many thanks to those who post their work for use by others, but most of the free patterns don't have diagrams. I have a really hard time crocheting from the written instructions, and do much better from the stitch diagram. Anyway, I really loved the snowflaky edging on this pattern and figured I'd just make it smaller.
It called for lace weight yarn, but really I'm terrible about following instructions directly and usually just use whatever yarn I'd planned on and one of my two favorite crochet hooks and hope for the best. I think my alpaca is a DK or Sport weight, but luckily this pattern had some tips for using a bulkier yarn. Unfortunately, I ran out of yarn about 6 rows from the end of the beautiful border, so I had to just finish it off with some scallops since there was no way I was going to be able to replicate that dye lot even if I'd wanted to. I love the way it turned out, and it's fabulously soft and warm and light.
Please pardon the fact that my hair is sticking up weirdly.
In other yarn news- my dear friend Kristin sent me some handknitted fingerless gloves for Christmas- she's such a great knitter and of course I love the pink yarn and the beautiful cabling. What a great Christmas present!!!
And finally, a bit of snowy goodness- we got 13-16" (depending on where you measured) at my parents' house, and enjoyed much sledding in their yard with my mom and sister and niece and nephew. The dogs had a blast....
Even though it isn't an art quilt, I'm linking up with Nina-Marie. Hopefully soon I'll be back with more on my current art projects!
Missy is a fairly grouchy dog and does not like to be brushed, so we keep her hair cut pretty short. Sometimes she's awfully shivery in the days after a haircut, and since it's winter anyway, Mike asked me to make her a sweater. I had no idea whether she'd even wear it, so I didn't want to put too much time into a crocheted one. And given the way she's especially grouchy about her head, it couldn't be a pullover.
With that in mind, I trawled the internet for dog sweater tutorials, and found this tutorial/pattern on Mimi and Tara. I didn't need a hood or a santa costume, but it had the requisite front closure, so using the pattern pieces as a base, I whipped up this little fleece number for Missy.
Overall it fit remarkably well for a first try. There are a couple of areas that I'd like to change next time, yes, some tailoring for dogs, but it went pretty well. She didn't like it at first, but she seems to like it fine now. Unfortunately, about three days after I made it, Mike accidentally put it inside a box containing a jacket he'd sold online and shipped it off across the country. Luckily the kind recipient sent it back to us, but for several days we could not figure out what happened to it.
I was always one of those people who couldn't understand why dogs needed clothes, but she does seem to get chilly in the winter, and she does look pretty cute. :)
Well now that everything has been opened, it's time for a roundup of crafty presents for the year. I love making things for my family and friends and it's one reason why progress on my big quilt was slow this past couple of months, but for me it's worth it.
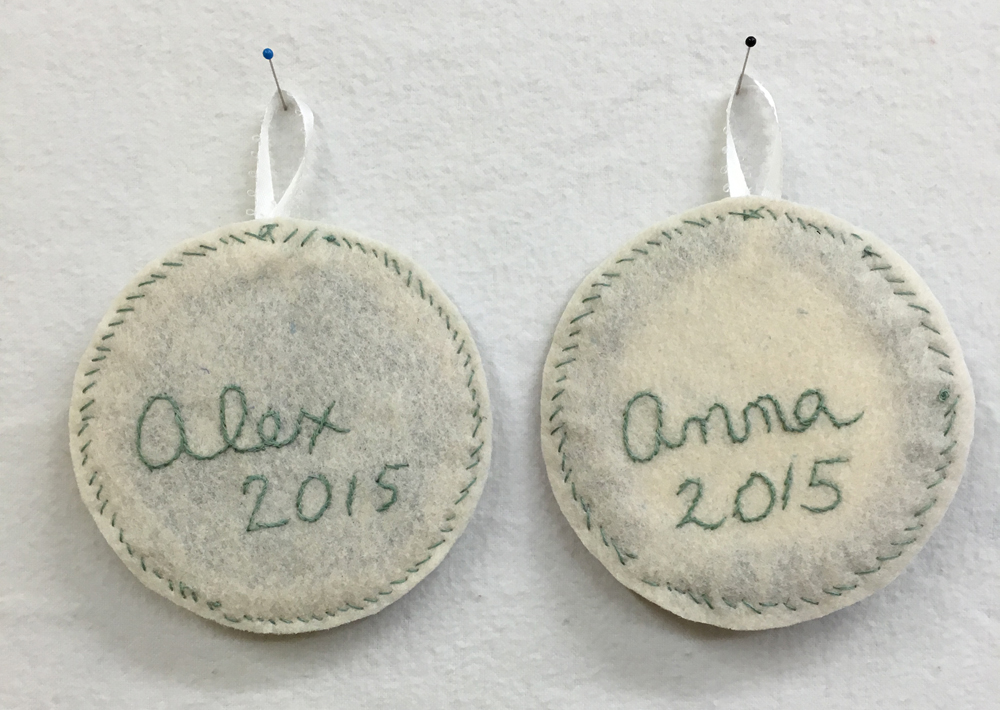
First up are the annual ornaments for Mike. I realized when I decorated the tree this year that this marks our 7th Christmas together, and it was fun to look back at past ornaments, most a snapshot of something he was into that year (and in many cases still).
This year I made a camera for him, specifically a Ricoh GR, which is what he often uses for street photography. It's a fairly understated camera, but I think that's kind of the point. Unfortunately since it was black-on-black, it was fairly hard to photograph, but you get the idea.
For Anna and Alex, I went the hand embroidery/bead route. These were just about the only good thing to come out of the dreadful OSU-Baylor football game... You'll see the chi-rho again, but on these I used some larger rock beads to fill the shape. I was not pleased with how visible the thread was when I sewed on the large beads, but they were all very awkwardly shaped and I couldn't seem to find away around it. I suppose it would have helped a bunch if I'd used a matching color of thread, but I'm no expert beader, so if anyone has any tips, please share!
While home at Thanksgiving, Becky said she really liked my daisy cross-body bag, so I made her one exactly like it (though with a different petal repeat). She asked for inside pockets big enough to hold sippy cups, so I made up something I think will work (in that first picture below). Between all the petal repeats on both bags and the bag linings, I've pretty much used up all my precious Jane Sassaman fabric. It makes me happy to use it, but a bit sad that it's gone.
And finally, Raegan is very into American Girl dolls, so for Christmas her mom and dad made her a set of bunkbeds and asked if I'd make bedding inspired by this. So I made two little doll quilts (both backed with minky) with matching pillows as well as mattresses.
Did you make or get handmade gifts this year? I'm looking forward now to getting back to my art- there are several show deadlines coming up, so hopefully I can make some progress on my big quilt.
Hi everybody, I hope the weather is ok where all of you are and there's not too much overwhelming winterness happening. I wanted to stop in today to share a quilt a friend of mine just finished. Her name's Barb and she's an outstanding microscopist by profession. She's the one that took the electron micrographs that this quilt is based on. She's pretty crafty, (this is the same Barb that made my beautiful rainbow crochet lace table mat), and has recently started quilting. I'm so excited (new converts always made me happy), and shortly before Christmas she sent pictures of the quilt she recently finished for her 10 year old niece.
I was so excited to see it, and am really looking forward to seeing more of her quilts as she makes progress! I love the pink scrappy look. This one is machine quilted, but she hand quilts as well, something I've still not learned.