Showing posts with label S is For.... Show all posts

Sunday, May 11, 2014

Fiberworks 2014 Opening

I'm still here, sewing away in the background.  Just wanted to pop in to say that I have had two pieces accepted into Fiberworks 2014, a fiber arts show put on by the Fiber Artists of Oklahoma.  The show runs from May 16th to June 10th at the Individual Artists of Oklahoma Gallery at 706 W. Sheridan, Oklahoma City.

The opening is Friday May 16th from 6-9, and the show is sure to be fantastic, we have a ton of excellent fiber artists in the area and it's so wonderful to be part of a show that features so many types of fiber arts besides quilting.

The two pieces I have in the show are Do You See What I See, and S is For...#2


I hope if you're in the area or passing through that you'll stop and see the show!

Wednesday, January 4, 2012

S is for Finished!

Ok, so S isn't really for finished but I am so excited.  I finished this quilt right before Christmas just in time for the deadline for the Oklahoma City Winter Quilt Show.  Any locals should head out and see it the weekend of January 12-14.   I feel like I've been working on this one forever but I'm really pleased with how it turned out, and I feel like I put a lot of work into making sure it turned out nicely with minimal mistakes.  It may sound weird, but I feel like I've done the best I could do with my current skills, and didn't cut any corners and that makes me proud.  For anyone interested in my (many) previous posts about this quilt, you can check them out (1, 2, 3, 4).

Sorry for the overabundance of pictures, I'm just so excited I have to show you bunches of them!

S is for... #2, c. Shannon Conley, 2011.  27.5" x  30.5"


I'm linking up with several of the regular places and also Works In Progress Wednesday, even though this isn't in progress any more.  The ladies over there have been so encouraging throughout this process I want them to see the finished thing too!  Rest assured there will be more actual WIPs next week!

Wednesday, November 23, 2011

WIP Wednesday: I did it!

Some of you may recall from a couple Wednesdays ago that I really wanted to get the quilting finished up on my Big S dragon quilt before Thanksgiving.  In the interim, I got sick, got distracted, and got busy, but I'm so excited to say that I actually did finish it!

The last few days I've been madly quilting whenever I have had a free minute, and last night after packing to go away for the holiday I finished up the last section. It's been sort of crazy, so I didn't have time to get final pictures, this is one I snapped quickly a few days ago.  Hopefully next week I can share some more.


Even though the quilting is finished there are still several things left to finish this quilt up.

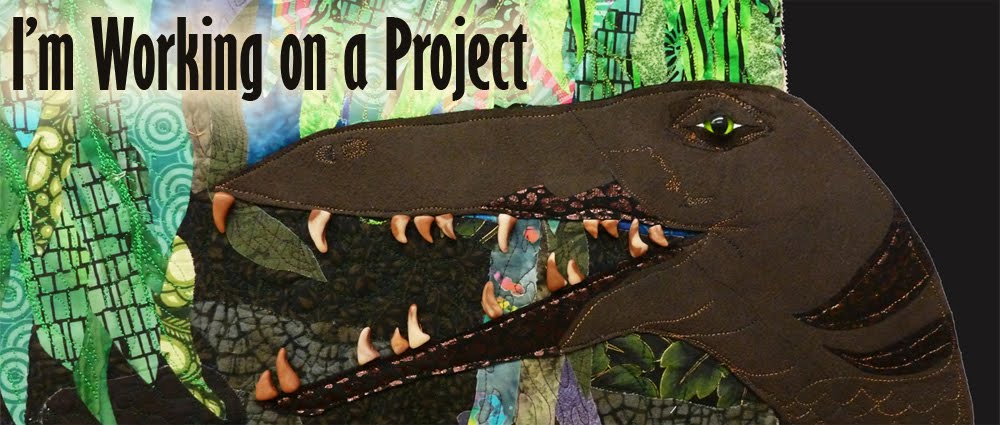
1. Do something with the dragon's head.  Right now the head isn't quilted and has no facial features.  At the very least he needs an eye and maybe some fun embroidery.  Any ideas blog friends?

2. Soak to remove quilting guidelines and water soluble thread.  I'm sort of scared about this because I know I have at least one really dark navy fabric that will bleed all over everything, and has in fact already bled on some bright yellow next to it, so I'm keeping my fingers crossed for this step.

3.  Square up and block.  I blocked some before quilting but need to do it again since it's gotten a little wonky.

4. Bind/label.  I'm still not sure whether I'm going to do a faced binding or a traditional binding with piping.  What do you guys think? Color ideas for the binding?

We're leaving in just a couple of hours to go visit my family in New Mexico.  I'm super excited as there will be hiking with the dogs and Christmas tree hunting in the mountains, and hopefully quite a bit of time on my mom's longarm working on a project I haven't even shown you guys yet! (It was number 1 on my tackling the UFOs post from way back in early summer!)

I hope whatever your Thanksgiving plans are they involve spending time with people that you care about.  I'm so grateful for all my supportive family and friends and hope you all have a great holiday!

Wednesday, November 9, 2011

WIP Wednesday: More Quilting on the Big (Neverending) S Quilt

As usual, my works in progress are many! I've been making a few small Christmas gifts (to be shown later) and starting to work on the upcoming costume project which maybe I'll post about next week. In my few remaining minutes of craft time, I've been plugging along with the quilting on my Big S quilt. It's really not that big, but much bigger than the small 8.5 x 11 S quilt I made earlier in the year. The quilting is going fairly slowly, but I am making progress. You may recall (from here and here) that the dragon is sort of S shaped with his foot in the center of the bottom circle part of the S. After much contemplation, I drew radiating lines every 20 degrees using the foot as a center point and filled the space with a fun filler from Leah's Free Motion Quilt Project.  She calls it channels and paths, I call it smiles and frowns.  I used different colors of thread depending on where I was quilting so some sections stand out more than others.  I alternated the smiles and frowns in adjacent sections, sadly that meant ripping out A LOT of quilting when I forgot to alternate several times.  Ripping out quilting is no fun at all! Sorry I forgot to get an overall picture, but here are a few shots of the new quilting.

The ugly red/orange lines are just marking lines,  they're water-soluble marker so will disappear in the end (as will the ugly white water soluble thread).

I'm finally done with this pattern and starting on a new area of this quilt!  I had hoped to be finished by Thanksgiving, but that seems pretty unlikely at this point.

What WIPs are you guys working on now?


Wednesday, October 12, 2011

Works In Progress: S is for Basting and Quilting!

I worked some on my big S Quilt over the weekend, and thought I'd show a little of my progress.  As of the last post, I'd just used water-soluble thread to sew in some faux-trapunto, and before layering the main batting and backing, I did some quilting over these regions.  I wanted them to have some stitching, but I didn't want to completely flatten out the trapunto.  We'll see how it looks in the end.  The main region in which I used the faux-trapunto was the dragon.  Here's what he looks like with some scales and feathers quilted in.  Ignore the ugly white stitching around the dragon, that's the water-soluble thread that will go away once I wash it.


For layering the whole quilt, I used wool batting and so far I like it.  Instead of spray basting I tried a new method this time.  You guys know how much I use spray baste, but it doesn't seem to hold things together as well on bigger projects and it makes a really big mess.  My mom recommended Sharon Schamber's method for basting.  She has two great youtube videos demonstrating the process (here and here) that are definitely worth a watch.  I went ahead and used her method, boards and all, and it worked great.  I used the herring-bone basting stitch as she recommends and it seems to be holding things together pretty well.  You just cut the basting stitches out as you go, and I haven't had any problems with them yet.


These are the big basting stitches.

The only regions I've quilted so far (in addition to the dragon) are some leaves and the tree branch.  I did pebbles and some spiky things in the leaves, and used a sort of modified version of this stitch from Leah over at the Free Motion Quilting Project for the branch.  Now I just have to plan the rest of it!


Sorry this one is so out of focus, I had a really hard time taking pictures of the brown.


What about you guys?  Any progress on the pile of UFOs?  I have such a hard time not starting new things, and now I have to switch from this quilt to focus on my swap quilt for the SewHappyGeek swap.

Friday, September 23, 2011

Works In Progress: S is for Sewing!

One of my large ongoing art quilt projects is the bigger version of S is for.....  I designed it and started piecing it in the Caryl Fallert class my mom and I took at quilt camp.  It utilizes her design technique and assembly method (appli-piecing), which I've talked about before (and here and here).

My mom just finished the quilt she started in the class- it looks phenomenal; her colors, design, assembly, quilting, and details are just fabulous.  She used this beautiful subdued olive-cream-maroon color pattern with a few pops of bright turquoise.  As usual, my chosen color palette is simply "bright."

I drafted the pattern based on the same initial S initial I used for the smaller S quilt, and added/subtracted detail as I went.  Each piece of the pattern serves as its own freezer paper template, so the pattern is consumed during the piecing process.  Here it is as I drafted it (before starting to piece).


I paper pieced the spikes in the center dragon and appli-pieced all the rest.  Originally, it had no border- just the dragon, but then I decided I would frame it with a skinny border and continued piecing on two sides (like the corner of a book page).


I decided I didn't like that, so then added borders around the other two sides.  Here's the final top.  The camera angle is bad, it really is pretty square.  I just machine appliqued the little flamelets coming out of the dragon's mouth, they and the foot are the only things not appli-pieced.  The very very saddest part is when I spritzed it with water and pinned it to my design wall to try to square it up a little bit, the dark navy in the bottom right corner bled into the yellow corner stripe!  I'm so sad, I have to figure out a way to deal with that.


I decided to do some faux trapunto under the dragon and a couple of leaves, so I layered muslin, polyester batting, and the quilt top and stitched around the dragon/leaves using water soluble thread.  I used the muslin because I wanted to stitch from the top side, but wasn't sure if the feed dogs would catch on the batting.  Afterwards, I trimmed the batting/muslin very close to the stitches.  This is the back of the quilt-  you can see the muslin kind of puffed up with the batting underneath.


I was originally going to wait and quilt it on my mom's longarm machine, but I really don't want to to wait until Thanksgiving, and have another big quilt top in line for the longarm anyway, so I think I'll try to do this one on my home machine.  I'll just have to be very patient and willing to rip stuff out if it doesn't look good.  The whole thing is about 30 inches square, so it shouldn't be too unmanageable.  Right now I'm just waiting for my batting to arrive.  I used polyester for the trapunto, and have usually used Hobbs 80/20 cotton/wool for my quilts, but my Mom said she's had really good luck with 100% wool batting lately so I ordered some of that.  I'll keep you posted on the quilting progress once the batting arrives!

Wednesday, June 22, 2011

Small S Quilt

My mom and I went to quilt camp for the second time this summer.  Quilt camp is the most amazing event ever, and I wish we could go each year.  Alas, it is pretty pricey, so every couple of years is about all we can manage.  Anyway, quilt camp is actually called Empty Spools Seminars and it's held at Asilomar State Park and conference grounds on the Monterey peninsula in CA.  The setting is pretty awesome, it's forested and full of wildlife AND on the ocean (no sand for this girl though).  You stay there and eat there, and attend a five day class with a really famous fabulous quilt artist of your choice.  Seriously, like summer camp for the quilt set.

This year we took a class with Caryl Bryer Fallert; anyone who is not familiar with her fantastic quilts should go look immediately and covet them.  Of course, they especially appeal to me with my urgent desire to use all-bright-colors-all-the-time-right-now!!!  Anyway, the class was super-duper and we learned a million fabulous things I'll talk about some other day.  At the beginning of the class we did a bunch of cool exercises (more on them also some other day), but toward the end of the class, we started designing our own large projects.

One of the exercises was to do something like 60 (no joke) small drawings/doodles inspired by magazine pictures, our imaginations, the view out the window, whatever.  We then picked a favorite to start designing our big project.  My favorite doodle was inspired by this "S" paragraph starting initial from a 12th century German manuscript.   We found it in this fabulous old book of copyright-free images my mom got from my grandpa.  I think he had it from his stagecraft days.


I designed my large S quilt based on it; I'll have a series of posts about that later as it's very much still in progress.  However, recently, a reader challenge in Quilting Arts magazine caught my eye.  The challenge was to design an 8.5 x 11 quilt incorporating text into the quilt in some way.  I decided to make a simplified version of my large S-quilt and enter my first-ever challenge!

Here's my pattern, I pieced the whole thing using Caryl Bryer Fallert's appli-piecing method which is very easy.


Sadly, for the second time I messed up and forgot to trace my pattern onto the templates in reverse, so I had to re-engineer as I went so the S wouldn't be backwards. Then I thread stitched the foot on backwards!  It was really wretched ripping out all those dense stitches.  I inked some of my favorite S-words in the border with Pigma pens and did a little shadowing with colored pencil.  For the fiery word the dragon/serpent is spitting, I used orange sharpie which bled a little bit more than I would have liked but I guess gives an interesting effect.  I also used a green sharpie on the green fabric to ink another S-word but it bled so much you can't even tell.  I quilted it on my Janome and put another S-word in the quilting.  Finally, I used seed beads for the big words at the bottom. I also did a faux piped border to give the little accent color. Special shout-out to Cheryl (yay Cheryl!!) who was kind enough to try to help me over the phone when I called her out of the blue for panicked help with the piping.  It turned out to be pretty easy (next time I'll try real piping) and I think the purple/pink gradation in the border nicely picks up the purple/pink from the serpent.  Keep your fingers crossed that it gets accepted into the magazine.  What are your favorite S-words?


Update: Sadly my little S quilt wasn't a finalist for the Quilting Arts contest, but I'll hang it up just the same!

S is for... #1, 2011 8.5" x 11"