
Well, I'll state right up front that I didn't completely accomplish my goal, but I did make significant headway (in my mind) on what turned out to be a fairly challenging part of this project. I suppose it's possible that I only think this part is challenging because I haven't done the next part yet, but at least the next part involves sewing and fusing and quilting, and colors, and I'm reasonably adept at those things.
My goal for last week was to get my Coelophysis art quilt pattern drafted. I'm making this quilt in response to a SAQA New Mexico call for entries, and the requirement for that show is a long (65"-80") skinny (18"-24") quilt. I decided to use the New Mexico state dinosaur (Coelophysis) as my subject matter. I'll share more about this particular dinosaur later, but from a design standpoint, I decided his head and tail should form sort of an S-shape on the quilt top. That was the only way I could think to fit him on a long narrow quilt, since he's really rather a long horizontal dinosaur.
One side of the quilt is going to feature the dinosaur's skeleton on a modern day background (Chimney Rock) and the other side will feature the dinosaur (still haven't decided what his personal name should be, Jerry maybe), on the background he would have lived in (Triassic vegetation, but still desert-ish actually). To start drafting the skeleton, I thought I'd go to our local natural history museum to take pictures of their specimen, but they don't have a reconstructed skeleton, only this very famous fossil. Cool, but not exactly helpful for an anatomically correct skeletal reconstruction.
.JPG) |
| I just realized you can see my tie-dyed reflection in the glass! |
So I did some googling, and found these two images to use as references.


Working with the coloring sheet (as a guideline for the shape) under a piece of tracing paper, I filled in all the dinosaur bones based on the anatomy in the other image. The coloring sheet wasn't quite accurate (some of the bones didn't fit in it for example), but it was only a guideline anyhow and I adjusted the shape to fit the bones. Here's my initial drawing.


Working with the coloring sheet (as a guideline for the shape) under a piece of tracing paper, I filled in all the dinosaur bones based on the anatomy in the other image. The coloring sheet wasn't quite accurate (some of the bones didn't fit in it for example), but it was only a guideline anyhow and I adjusted the shape to fit the bones. Here's my initial drawing.
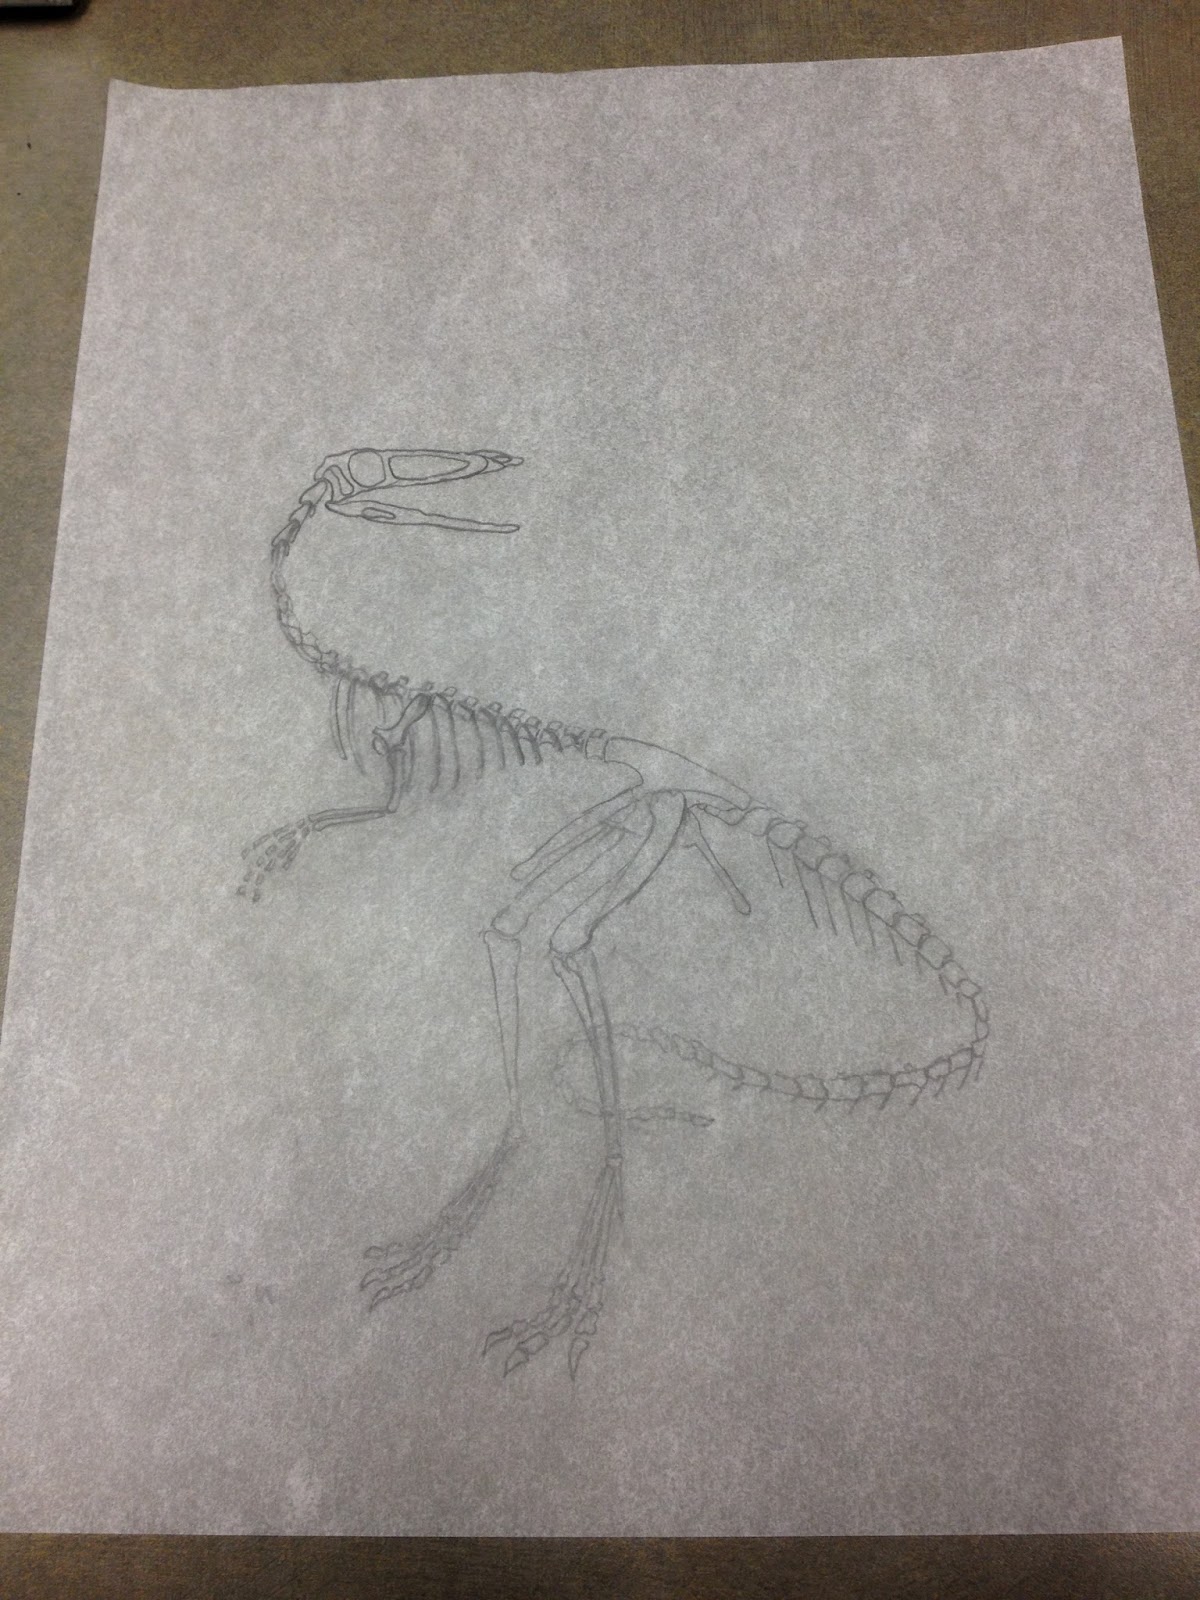 |
| Original Skeletal Drawing |
Next, I outlined it, so that the dinosaur for the back would match with the skeleton on the front and then scanned both pages into the computer. My intention was to use the trace function in CorelDraw to turn my line drawings into vector art so I could blow them up at will without losing clarity.
However, I soon realized that the insufficient darkness of the pencil marks coupled with the texture and smudges on the tracing paper conspired to confuse the trace function and resulted in very poor traces. You can see below the scan of my original skeleton (converted to a BMP file for the tracing function) and the trace that CorelDraw made from it. Clearly not helpful.
So after playing with the corel settings for a while, I went back to my pencil drawing, and traced it onto bright white copy paper using a fine point pigma pen in dark black. I then put this in photoshop and used the selection tool to get rid of as much background as I could before putting the BMP into CorelDraw and using the trace function again. The result still wasn't perfect, but was much better, and I think usable. From far back it's hard to tell the difference, but up close you can see easily the improvement in the second drawing.
 |
| Scan of original drawing |
 |
| CorelDraw trace of original drawing |
So after playing with the corel settings for a while, I went back to my pencil drawing, and traced it onto bright white copy paper using a fine point pigma pen in dark black. I then put this in photoshop and used the selection tool to get rid of as much background as I could before putting the BMP into CorelDraw and using the trace function again. The result still wasn't perfect, but was much better, and I think usable. From far back it's hard to tell the difference, but up close you can see easily the improvement in the second drawing.
 |
| CorelDraw trace of second drawing |
 |
| Close up of two different traces from CorelDraw |
I had hoped to be completely finished with the pattern- background and layers all figured out and ready to print. The dinosaur part took way longer than I thought though! Lots of fiddling around with the computer programs trying to figure out how best to get a scalable line drawing. I may still go back to the photoshop version- it's not scalable in the way a vector drawing is, but it may be better for the pattern. I'll have to see how they both look when blown up.
One of the things that I found frustrating with CorelDraw is that even though it has a line art setting for the trace function (affecting how it looks at your picture), it still treats the lines as objects (i.e. 2 dimensional) rather than one dimensional (like a true line). Practically speaking, this means that each piece of line is an outlined object the thickness of my drawn line (like a very skinny rectangle) rather than a line. If I set the drawing to have no fill, you can see what I mean. Look especially at the difference between the right and left arms. The left arm is the one that CorelDraw traced from my drawing, you can see it's outlined (an object rather than a line). The right arm, I drew in (using the line/shape tools) afterwards, so it's a line (with adjustable thickness, but still a a line).


For the purpose of making pattern pieces, it would be infinitely preferable if the program could recognize that the lines on my drawing are just that, lines, not objects. I actually think this may be a feature of some of the newer versions of CorelDraw (X5 and X6) as I hear they have something called center trace, but in the version I have (X3) they just the regular trace function I used.
I have no idea if this is the best way to go about drafting a pattern like this; I use photoshop extensively at work, but I'm a relative newbie to CorelDraw so if anyone has any insights I'd love to hear them.
Many thanks to anyone still reading! What a wordy post. Sorry if it was boring, it's certainly the least colorful post I've ever done! Hopefully there'll soon be pictures of this at a more fun stage.
Holy cow...this seems insanely challenging. Im sure you'll get it all to come together. Im especially excited about the two sidesness!! Good luck.
ReplyDeleteNOT boring at all!!! While working with the software programs was time consuming....to get your desired results...
ReplyDeletethink how far ahead you will be the next time you are in the design phase or in completing this design for that matter. Look forward to seeing this one progress!
Really interesting! I have often wondered about those drawing programs. I do a lot of blowing up by hand because I don't have any, and frankly don't know which to buy. Good luck with your dinosaur!
ReplyDeleteThanks for the comments guys! I'm really not sure how the two-sidedness is going to go- for the quilting especially there will be challenges, but I'm jumping in with both feet!
ReplyDeleteSo awesome! Can't wait to see more progress on this quilt! I think you should name the dinosaur Seymour. :-)
ReplyDeleteI have been using adobe illustrator but it is beyond me! It was gifted it so I don't have to worry that I invested too much money. I am amazed how thorough you are for this!
ReplyDeleteNicely written and easy to follow
ReplyDelete