Friday, March 16, 2012

Cutting Table

After they finished the design wall, my dad and Mike were sweet enough to build me a giant cutting table on wheels.  I wasn't sure I'd like it on wheels but so far I've already moved it around to take pictures in front of the design wall and to clean under it.  It's slightly higher than my sewing table too making it great for cutting without back strain.  We chose the size so I could have get the three panel olfa cutting mat which is great for squaring up large quilts.  I didn't have one before, but was excited to use a 50% off coupon to get it at Jo-Ann's last week (love those coupons).

The frame of the table is built out of 2x4s and the top is three small hollow-core doors we got from the Habitat for Humanity ReStore for way cheap.  They're great for the table top.  So far I've also been enjoying using the table for other projects too (as long as I don't get crafty stuff on the cutting mats).


Thanks to Dad and Mike!  The cutting table was the icing on the cake for my yummy work space!

Wednesday, March 14, 2012

Rolling Design Wall

I realized I never showed you guys the fabulous design wall my dad and Mike built for me when my parents were out a few weeks ago.  One wall of the studio is filled with wire rolling shelving units and my goal from the beginning was to have a big design wall in front of the units.

My dad is very handy and designed a system comprising 3 4'x8' panels which roll in a track and are held upright along a high shelf.  He and Mike built and installed it and it's pretty super awesome.  The 3 units roll together or apart so you can use a lot of space to work on big quilts or just work on smaller projects.  There's also space to access all the wire shelves, plus the large shelf on top (which currently houses a christmas tree).

For the actual design panels, they attached 3/8" plywood to a 2x4 frame (with cross bars).  We then glued 2x4 pieces of celotex ceiling tiles on each one and covered them in flannel. 


You can hang stuff with pins or just stick it on the flannel. In addition, you can iron on it or steam on it.  So far I love it; I've got one with lots of my little inspiring things pinned up on it and the other two I'm using for designing.  Thanks so much Dad and Mike!!

Monday, March 12, 2012

Diaper Bag

My sister's baby is due any minute and I'd offered to make her a diaper bag so I thought I'd better get to it.  I asked her to look at a few options, and she really liked this one, so off I went.  It's a medium-complicated bag to assemble, but the tutorial/instructions were great, easy to understand, and accurate.  It took me quite a while to cut all the pieces but they all came out right and went together properly.


Becky liked that it has lots of inside and outside pockets (including an outside pocket big enough to hold file folders if necessary.  She also wanted one with a center divider (which this has). 

I used mostly fabrics from my stash, the outside black is canvas which I thought might hold up better, but everything else is brightly colored (cause it's a Shannon-made item after all) quilters cotton.  I scotch-guarded all the pieces before I assembled them so it should hopefully repel stains at least a little bit.


 It's pretty big, so hopefully she can fit all her baby stuff in it!


I only made two tiny departures from the pattern.  It has several layers of interfacing to give it structure, and instead of regular fusible fleece, I used insul-bright batting in the two end pockets.  Insul-bright is the batting you use in potholders, and it's designed to be insulating.  Anyway, I thought if I put it on the outside and inside of the two bottle sized pockets it might keep bottles at temperature a little bit.  The other thing is that I added a shoulder strap.  Becky wanted to be able to carry it cross-body.  Here it is hanging with the shoulder strap I made.


Becky really liked it.  Keep your fingers crossed for the prompt arrival of the baby!  I had a good time making the bag and I think it was probably good practice for making the Amy Butler Weekender bag which is still on my to-do list.

Saturday, March 10, 2012

Ribbons Finished! Who will win?

I'm down visiting my sister this weekend, but I thought I'd pop in to say I finished the two things (mentioned here) that I had deadlines for.  The first is a diaper bag for my sister which I'll share later in the week, and the second is the match ribbons which are needed tomorrow.

As with the last time I made match ribbons, they're most likely to be won by non-crafty man types but they got a good reception the last time I made some, so I hope they are well loved this time.

I changed my construction process a bit from last time, instead of making yo-yos and sewing the tops together with felt, the top portion is made of a gathered ruffle and the round center medallion.  The center medallion is ironed/hot glued around a circle of card stock, you can see the unfinished centers in the picture below.  I also used the inkjet printable fabric instead of the pigma pens since I was doing so many and wanted them to be consistent.  All the hanging down ribbons are turned; boy am I glad to be finished with those.


I think they turned out really bright and colorful (one of my main personal criteria for successful project), so I hope they are enjoyed.  I might be in the running for one of them, it'd be nice to get to keep one.  It was a fun project, although making this many was a bit tedious.  By the end I got a sort of assembly line process going but all together I probably spent an average of 45-60 minutes on each one.

Monday, March 5, 2012

Name Game Swap Quilt

I signed up for the Name Game Swap over at Samelia's Mum, and it's been really exciting to watch everyone's progress and sneak peaks over on the flickr group.

My partner received hers so I thought I'd finally write a post about it.

My partner is the fun Sharmayne of Country Fragrance.  She lives in Australia where she crafts and makes and sells soaps and has chickens and yummy looking garden carrots!  I wasn't quite sure what she'd like since she isn't on flickr, but I've been reading her blog and so hoped she liked what I put together.  Well, she did like it (so total YAY!), but she's currently in the midst of great flooding, so keep her and her family in your thoughts!

The point of the swap was to make a mini-quilt which incorporated the name of our partner's blog.  I used inkjet printable fabric for my words.   I decided to use hens and flowers for the rest of the quilt so made some grandmother's flower garden blocks and machine appliqued some colorful hens with fun fabrics from my stash.

I love the pink grass and I hope she does too!


I made a little blue zip-top pouch to send along as well (you can never have too many of those) and included a half yard cut of this pretty oriental inspired fabric.  I hope she can use it in an upcoming project!


Thanks for hosting such a fun swap Anorina!

Friday, March 2, 2012

More Preparations for the Animal Cracker!

My mom and dad and sister came up to visit last weekend and I was so excited for them to see the new studio.  Whenever they come we have projects planned, and the two big ones for this weekend were to build the design wall and to build a cutting table.  I’ll have some happy posts about that wonderfulness early next week.  But while Mike and Dad built the design wall, my mom and Becky and I did some sewing projects.
Our main project for the baby was to use my Mom’s serger to make some big swaddling/receiving blankets and some flannel burp cloths.  These have been popping up everywhere lately, but I got the idea from talking to the fabulous Kenda who’s also expecting soon.  She really liked homemade simple flannel receiving blankets for her first son since they’re bigger than the ones you can usually get.  She also said that flannel burp cloths were pretty absorbent.  So off we went to Hancock's for some fun coupon-eligible flannels.
After washing the fabric, we cut big, square, single thickness pieces out of the flannel for the blankets.  We just rounded the corners and serged  the edges and they were finished!  For the burp cloths we layered two thicknesses of flannel and serged around those edges.  What easy projects to give such cute results!  Becky even practiced swaddling on the life-sized Martha doll my mom made me when I was little.
P1050347
P1050348

We mad five blankets, two out of the mushroom fabric and one out of everything else.  I think  Becky’s favorite was the aliens, but I really love the animals and the sharks.
P1050361

Here are the burb cloths
P1050363

In addition to the blankets/burp cloths, we made (after great trial and tribulation) a little fabric book.  It’s made out of a preprinted fabric panel Becky and I snagged off a sale bolt last fall and we finally put it together.  I really liked it since it featured a pretty adorable mouse.  Alas it turned into a  comedy of errors from beginning to end.  To make it more difficult there were no instructions or page numbers (although there was a story of sorts), so it was hard to tell how to assemble it.  Really though, all you had to do was cut out and sew the pages together.  We started late at night (thinking it would be easy) but I can’t tell you how many we cut wrong, how many wrongly sized interfacings we cut out, or how many times we had to rip out all the stitching holding to (wrong) pages together.  There was MUCH frustration and MUCH laughing.  You would not believe how much trouble 3 reasonably competent sewers had assembling this thing.  But in the end, we got it and it’s pretty cute.

P1050336
P1050337
P1050338
P1050339
P1050340
P1050341
P1050342
P1050343

P1050344

It was so wonderful to have my family out and I was so sad when they had to leave.  We had such a good time and had so much fun enjoying each other’s company.  Hopefully we’ll all gather again soon when the baby comes!
Wednesday, February 29, 2012

WIP Wednesday: Deadlines Again!

I’ve been feeling a little stressed lately.  I have so many projects going, so many cool quilts to make, and a couple projects with deadlines in progress, yet I’m often so tired when I get home from work I don’t have the energy to work on anything.  Then I feel guilty that I’m wasting valuable time!

Anyway,  I thought it would be good to write an in progress post and link up with Lee.  I always love her linky party; seeing what everyone else is working on is motivating and inspiring.

Finished this week:
Nothing.  Sad smile

In progress:
Diaper bag for Becky (deadline March 11th)
15 fabric ribbons for Oklahoma Single Stack Championships (deadline March 11th).  This is all I’ve done so far!  One half of one ribbon!  Eek.
P1050384
Amy  Butler Footstool (this is soooo cool, and we found the perfect fabric, more on that later).
P1050380
Flower crochet blocks  (I’ve made 6-8 of those and am really enjoying them).
P1050385
Bobbin Quilting/Trapunto blocks
P1050382

No Progress:
Dog thread painting
Chile Quilt
Christmas Nativity

New Projects:
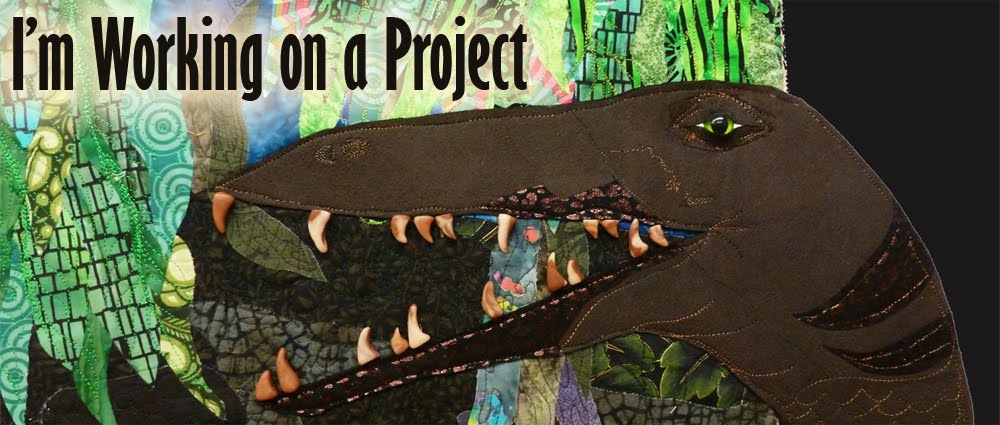
Not that I need any new projects, but I’ve decided that my next big art quilt will be an entry into the upcoming juried show put on by SAQA New Mexico.  I’ve never entered a juried show before but I figure now is as goo as ever.  The quilt is to be banner style, long and skinny (24 x 80 or so) and should be “outdoor New Mexico” in theme.  I’m super excited for the design process.  I’ve decided to make the New Mexico State Dinosaur my focus.  He’s called Coeleophysis, and I’ll have much more info on him soon (if I ever get some creative design time).

I hope you guys are having fun and making more progress than I am!

Saturday, February 25, 2012

Second Baby Syndrome and the rise of the Stucks

Have you guys read Shel Silverstein’s poem about the goat who ate the little boy’s fabulous story?  I love his poetry and that one is particularly fitting today.  In it, the little boy is waxing rhapsodically about the wonderful story and how the goat ate it and it was all the goat’s fault and he could never replicate the story and so now all we get is a mediocre story.    It’s  a pretty cute poem, with an adorable goat illustration.  Well, today I have my own version- blogger ate my post!  I super promise I had a lovely post on these quilts all scheduled to post right before my parents got here last week (more on that later this week) and then it disappeared!  I have not idea what happened to it, whether blogger really ate it or I just accidentally deleted it, or what, but alas its gone.  So here I will try to replicate it but you will never know whether it lives up to the previous version.
Back in the day I made a bunch of baby quilts, but at some point there started to be more babies than I could keep up with so I started doing other smaller projects for them.  I was pretty ok with this decision until we got home at Christmas and started going through all the baby quilts there.  One of the most striking (and sort of embarrassing things) we discovered was how many more quilts had been made for me than for my sister.  We decided this was “second baby syndrome” at work and I felt really bad about it!  So to avoid falling into that trap, I decided I should make baby quilts for any siblings of children for whom I’d previously made quilts.
A little over three years ago, my friend Michael Stuck and his fun wife Natalie had their first baby girl.  I didn’t have any pictures of the quilt I made for her, but Michael was kind enough to take one and send it to me.  The lady bug blocks are paper pieced, and I chose the fun complementary mouse fabric since Michael and I are mouse people.  Mary has turned into a really bright and entertaining little girl- very friendly and articulate and the least picky eater I’ve ever known!
DSCN4552
Now they’re expecting another baby girl (Samantha) right about the same time as my sister is expecting her baby.  I decided to make a quilt for Samantha using the charm pack I won last year in the SewHappyGeek tablerunner/wall hanging swap.  I’d intended to make a tablerunner using the pattern that Jenna made after the swap, but in the end decided the charm pack would make a great baby quilt.  It pieced up really quickly and has a bunch of fun variety.  It’s the first time I’d ever used precuts, and they were perfect for this type of project.  I used the coordinating solids for borders/sashing/binding, and I quilted spirals in the center blocks, my favorite bubble pattern in the vertical borders,  and a leafy pattern in the horizontal border.  I hope  she likes it!
P1050124

P1050119

Good luck and prayers to the Michael and Natalie as they await the arrival of their new little girl.  If she’s anything like Mary, we better be prepared for the Stucks to take over the next generation!

Friday, February 17, 2012

Valentine's Day Cards

I hope you guys aren't too sick of Valentine's Day quite yet, because I have one more project to show! I love making Valentine's Day cards for my relatives, and try to do something different each year.  Last year I made 3D garlands and the year before that I did origami valentines.  This year, I was inspired by this image I found on pinterest.


Here are a few of the valentines I made based on the text from it.  It's always fun to get out my scrapbook paper and cardstock.  I think glue sticks are my favorite craft supply, I use them for so many things, even including quilting.


Then, because I've been wanting to make these flowers forever, I looked up the tutorial on whip up and made some into Valentine's flowers for my friend Cheryl and Mike's grandkids.  They were fun and easy to make, but fairly time consuming.  I used an old map of Italy for the flower part.  I used to occasionally go to old garage sales looking for National Geographics just so I could get the old maps, but then I found this great used bookstore in Tucson called Bookmans.  They had a bin of just the maps over by the magazines and you could buy them for a dime or something.  Anyway, I don't know if they still have it, but I bought a ton of them.  They're so great for wrapping paper and crafting and everything.  I used old pipe cleaners (I guess now they're called chenille stem) which I found only because I actually cleaned up my craft supplies when I into the building.  I had no idea I even had them.  I almost threw them away but am glad I didn't!  Green would have been better but these did in a pinch.


Do you guys make valentines?  What kind of seasonal crafting is going on in your neck of the woods lately?