Showing posts with label Smocking. Show all posts

Tuesday, September 3, 2024

New Quilt C. Bauri, Feathers or Scales

 In the ongoing effort to catch up on blog posts,  here's a new quilt I made close to the beginning of this year in preparation for this summer's 3D exhibit at the New Mexico State Capitol (which just came down last week).  


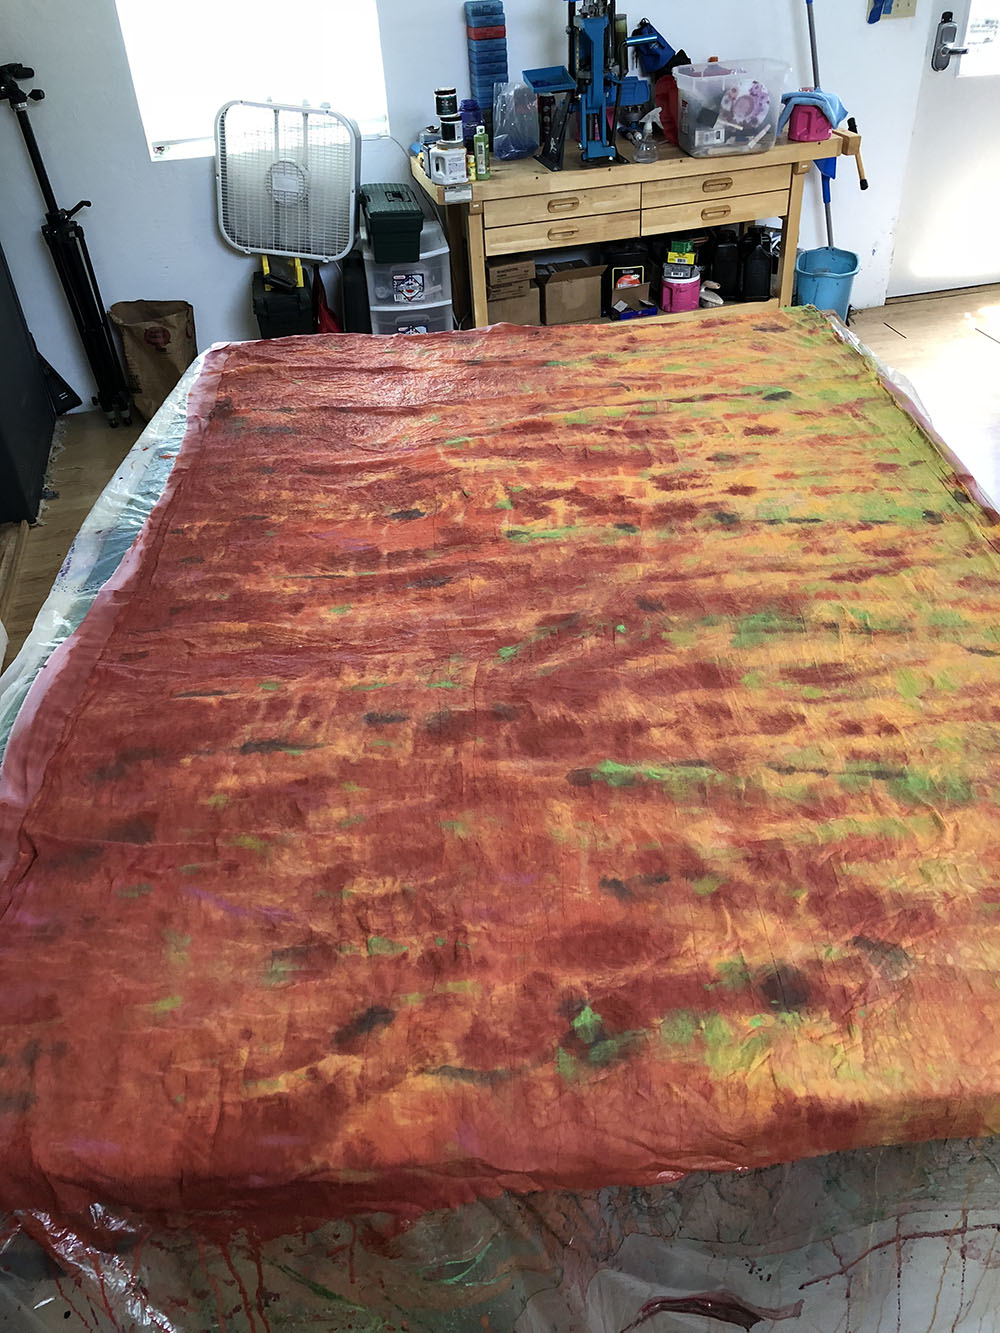
This started out as some weird upholstery weight kind of scratchy stiff fabric that was sort of beige with orange and brown flowers on it?  I had a fairly large roll of it that I inherited from my sister's mother-in-law (thanks Mary!) and was determined to use for something.  I decided to paint it and quilt two layers of it together with no batting and see what kind of 3D thing I could make.


I decided to try to make a vessel, and so I trimmed it into this weird shape and sewed up the corners, but it really just wasn't working.  It was too floppy and too open and really just not coming together like I thought.  So I unpicked all the stitches and since the Capitol show was coming up I decided to smock it. 

I went looking for a new smocking pattern and found an article from a computer science journal on 3D modeling of predicted pleat patterns/smocked patterns which very much delighted the nerd in me.  I'm not sure if anyone has ever smocked these patterns in person but I decided to try one of them.  Unfortunately now I can't find the paper- if I ever do I'll link it back here. I wasn't sure how it would work since it was cut to such a weird shape but I thought I'd give it a try.

It turned out pretty cool- this is the first time I've made a smocked pattern that goes horizontally rather than vertically.  And the shape reminded me of the shape of an arrowhead or a scale.  The scale vibe is what led to the title of the piece,  C. Bauri: feathers or scales.  C. Bauri is my beloved Coelophysis, the carnivorous theropod that has shown up on my quilts before.  I think historically we always thought of them as scaly, but I think current thinking is that they were feathered!

I like the way this came out, I like that the shape is different from others in this series, and I love the blendy earthy colors.


C. Bauri: Feathers or Scales, c. 2024, Shannon Conley, 43x50x5


Tuesday, February 14, 2023

Lantern 3: Finished

 Over the weekend I shared about this art quilt I made last year.  I really hated the colors, they felt really gross to me.  I struggled with what to do with the piece. I thought about cutting it up and using it in something entirely new, but I really liked the shape and the texture from the couching, it was just the colors I hated (Easter candy barf).  I thought about spray painting it black, or spray painting it neon pink, but I worried that I wouldn't be able to get into all the nooks and crannies in the smocked folds.


Finally I just decided to try painting over the pink.  The pink is what was really bothering me.  I know that's a shocker to everyone who knows me, but pink with brown and yellow was just bad.  I got out my orange pain and just tried my best to cover up the pink without looking like I had just slathered orange paint everywhere.  I picked orange since I thought orange/brown/yellow (with again the weird pops of turquoise-no idea what I was thinking originally), would pull it back into the colors of the southwest, the rocks, the cliffs, the mountains, the dry high desert, and the sky.  I think the orange also goes better with the burnt maroon and brown yarn that's couched on the surface.

 Up close there's now a lot of fun color variation and while I don't think it will ever be a favorite piece, I at least like it enough to share it with the world!

Lantern 3, c. Shannon Conley, 2023, 30" x 13" x 5"


So a few lessons learned here.  First, sometimes it just takes a few months of something ugly hanging on the wall before you settle on a way to fix it.  And second, even if there's a pressing show deadline, if you hate the starting fabric, you'll probably hate what you make with it!!

Have you ever had pieces you really didn't like?  What did you do with them?

Saturday, February 11, 2023

New Quilt: Lantern 3


Last year I started a new smocked art quilt, and spoiler alert, I hated it so much that after I finished it I didn't even want to blog about it.  But recently I made some changes to it to bring it back into my good graces, so I figured it was time to share.

I started, as usual, with painting fabric.  To be honest, I have no idea what prompted me to initially pick the yellow/pink/brown color scheme (with pops of turquoise?) but I did.  


Unfortunately, the paint didn't set well (my fault for washing it out before ironing) and then for some strange reason I painted on more brown and some purple?  I was in a time crunch for a show entry, so I just proceeded.  I quilted it, and then in an effort to make it more earthy, I couched a bunch of brown an orange yarn down in the quilting.  I smocked it using a tighter smocking pattern than usual and then mounted it on a piece of sono-tube to give it the semicylindrical lantern shape.


I love the shape and the smocking pattern, and I even love the extra oomph that comes from the couched yarn, but the colors were just gross.  Washed out, and pale, but also feeling like Easter candy barf?


I really struggled with what to do with this piece, come back Tuesday to see what I landed on.


Wednesday, November 25, 2020

Cloud Rim: Summer 1991, Finished

On Monday I blogged about a new smocked piece and showed the painted and quilted fabric.  Today I'll share some finished shots after I smocked it.


Here's the finished piece.  It's fairly large (and of course has to ship flat), finishing at 69" H x 44" W x 4" D.  You always lose a lot when smocking.  I decided to do the smocking on the diagonal which generated a parallelogram rather than a rectangle. 

It was quite tricky to mount and hang because the top and bottom points don't line up (since it's a parallelogram and not a diamond), and I wanted the smocking lines to be vertical.  I made a wooden frame for it which was challenging, and the piece mounts to it with velcro.  Of course I didn't take any pictures of the back, and it's a pain to take down once it's hanging, so for now, only pictures of the front.


Camp Cloud Rim, Summer 1991.  C.2020, Shannon Conley, Photo Mike Cox 69" x 44" x 4"


I love the swirly paint on the bottom tip!


The artist statement reads: The flexibility of cloth and stitch lends itself well to creating motion and texture; organic openings shift in shape, color, and depth. This piece is part of a series capturing places dear to my heart. I spent my childhood in the dry mountains of southern New Mexico, a place where the tiniest of creeks was cause for delight. So I well remember the urgency and excitement I felt when I got the chance to go to summer camp with a friend in Utah; a place with not only mountains and trees, but the new and wondrous experience of a lake.


I was sorry this didn't get into QN, but I love the way it turned out!


Monday, November 23, 2020

New Quilt: Cloud Rim, Summer 1991


I made a new smocked quilt earlier this summer and wanted to finish it for the Quilt National 2021 show.  I got it done and entered, but sadly it didn't get in.  I'll enter it in other things, so not to worry. 

My inspiration color palette cam from memories of Girl Scout Camp in Utah as a kid.  I was one of those kids who loved camp (I still love camp), and had the privilege of going to Girl Scout Camp for a week every summer (as well as other things later like church camp). 

The camp I grew up going to was Camp Mary White in Mayhill New Mexico, and I have many wonderful memories from my time there (llama camp was especially fun).  One summer though I got to fly to Utah to go to Camp Cloud Rim with my friend Tristan.  It was very much like other Girl Scout camps I'd gone to, lots of hiking and singing and other outdoor activities, but miraculously it had a lake! 

Lakes were never something we did much of as kids-  it was very dry where I grew up and I was always envious of summer camps on TV which all seemed to have lakes (the original Parent Trap was one of my favorite movies as a kid).  Anyway, it was so cool to go to camp where there was a lake to swim and canoe in.

I started this piece with those colors in mind, and as usual painted a large piece of fabric (about 60" x 85").  It was some sort of pink polyester,  from the wondrous Georgia boxes.  The pink underlying color gave everything a sort of warm tinge, but that's ok.  After painting, I quilted the whole thing and finished the edges.  A lot of the shapes in the color come from the wrinkles in the fabric on my table.


Here's the whole thing after painting, quilting, and blocking.


These two show the back-  In this case I used the same fabric for the back.  I put the backing underneath the front fabric while I'm painting.  Less paint is wasted that way and the backing has a similar (though not as paint-dense) color to the front.


It's always more interesting after the sculpting, so come back Wednesday to see the final piece!

Friday, July 13, 2018

Third Smocked Quilt Finished: High Desert Garden

On Monday I blogged about the early stages of my third smocked quilt and today I wanted to share the smocking part.  After finishing/facing the large fabric I marked it for smocking.  I started out with a vertical smocking pattern I found, but the written diagram did not match the picture.

It made these vertical channels (which I wanted), but they were extremely close together.  I didn't get a picture of it fully smocked, but the 84" wide quilt was ~24" when smocked and the pattern felt way too dense.  I tried just taking out two middle rows (the picture below), but the spacing wasn't really right.  I took out the rest of the smocking and sighed.


Next I tried a more organic-feeling pattern.  I really liked the crumpled look in the middle of the quilt, but it didn't fit evenly into the grid I had marked, (which I didn't realize until after smocking) so there was no way to get both side edges to look right.  It was really aggravating since I liked the pattern, but unlike a pillow or something in which the smocked edges will be enclosed, the edges on these pieces are loose, so they have to look reasonably presentable.  Alas, I took out all the smocking a second time (!!!).


Finally I went with this more linear pattern,  I wanted something that still felt like it had organic shapes but that would allow the edges to line up properly.  I made my grid a little bigger which gives it a bit more depth and fewer repeats.  In general the depth is good, but it seems to be a tradeoff between depth (good) and fabric floppiness (bad).

Like the one before,  I made a frame for the back of this quilt.  For the last one, I just stitched the quilt to the frame, but I didn't really like that approach.  For one thing, there's no easy way to remove the quilt from the frame, and for another if the thread wears against the wooden edge of the frame, it breaks.  So this time I hand stitched a bunch of pieces of velcro (the soft side) to the back of the quilt (you could see them in the last picture I shared Monday), and stapled the rough side of the velcro to the frame.  I like this better- you can make fine adjustments to the placement and easily remove the quilt from the frame if needed.


Here's what it looked like mounted to the frame, but after looking at it, I thought it needed a tiny bit more color, so I added some flicked spots of strong green, gold, red, and pink.  It doesn't change a lot, but adds a bit of depth I think.


And final pics.  I've had fun doing this series of smocked quilts, but I think this will be the last one for a while.

High Desert Garden, c. Shannon Conley, 2018, 41" x 34" x 6"
Photo: Mike Cox

High Desert Garden-Detail, c. Shannon Conley, 2018, 41" x 34" x 6"
Photo: Mike Cox

High Desert Garden-Detail, c. Shannon Conley, 2018, 41" x 34" x 6"
Photo: Mike Cox

High Desert Garden-Detail, c. Shannon Conley, 2018, 41" x 34" x 6"
Photo: Mike Cox

High Desert Garden-Detail, c. Shannon Conley, 2018, 41" x 34" x 6"
Photo: Mike Cox


Monday, July 9, 2018

New Project: Third Smocked Quilt

I've shared a few in-process sneak peeks of my third smocked quilt, and I just recently finished it so it seemed like a good time to jump in and share a little more about it.

In common with my other smocked quilts, I started with a large piece of solid color fabric.  In contrast to previous quilts, this time I used a fabric with a raised pattern woven into it and without sheen.  In the end I was really sad to be missing the sheen-  one of the things I loved about the previous two smocked quilts was the shiny look.  I realized after comparing this to those that that shine really did come from the original fabric surface rather than the paint.


backing fabric is on the left, front fabric on the right


Anyway, I painted the fabric to look like an abstracted field of flowers- indian paintbrush or red-hot pokers which are two of the high desert flowers from where I grew up.  My mom sent me this picture of the red hot pokers at her house this year. 


In this painted picture it looks a little shiny, but that's just because it's still wet.  The actual fabric has quite a matte finish.


 After painting, I basted it (with much "help" from the dogs), and quilted it.  It was a lot of fabric to wrestle under the sewing machine, and unfortunately, at one point I got the edge flipped around the back, so that meant lots of ripping.  Sigh.


It was a quite large piece of fabric, about 84 inches wide and 58" long-  as you can see here when I had it pinned up to block, but you'll see in the final piece how much of that gets sucked up by the smocking.


The wavy edge nature of these smocked quilts means that sometimes the back/back edge are visible from the front, so when I painted the front fabric, I placed the back fabric underneath it so the paint that seeped through the front soaked into the back.  Thus the back was the same colors (if not quite so intense) as the front.  I made the facing out of strips of the front/back that I trimmed off when squaring up so they too would blend.  The facing is a bit narrower than I usually do because I didn't trim off very much.  But I much prefer a blendy facing to one that stands out whenever you catch a glimpse of the back. 


Come back Friday to see the final quilt and see the smocking.