Friday, January 13, 2017

Portrait of the Kids Part 2

Last time I showed how I painted the flowers and kids in my new portrait quilt, and today I wanted to talk about how I finished it.  Unfortunately, my in-process picture taking really slacked off after the painting steps.

The bottom half of the background started with a piece of fabric that was some sort of cotton poly blend thing with light brown specks that was masquerading as linen.  I drew the porch lines with brown sharpie, heat set, and then mixed up some watery grey paint and painted over them, so the cracks wouldn't look so much like harsh lines.

The shadows are all done using layer after layer of painted and cut organza.  The organza was really shifty (of course) and it was really a mess trying to line everything up enough to get it all lightly glued down.  The top half background started with a yellow piece of cotton over which I layered several pieces of light blue organza to give a bit of depth.  I wasn't sure what I wanted in the background, the original picture was completely full of bushes all the way around the whole picture, and I knew I didn't want that.  I started with some light green tree shapes cut out of organza which helped but still was fairly boring.


Next I cut out a bunch of leaves and stems out of organza and tulle and layered them on along with another layer of light blue to cover it all up.  I liked that quite a bit better, but the transition from the top to the bottom half still felt a bit abrupt.  I finally decided to insert a piece of brown organza and quilt a little wall right at the edge of the porch.  I don't have a picture of that, but you can see it in the final pictures.  One of the interesting things you may notice about the above and below pictures is that the dark sides of the flowerpot switched.  In the original images the profusion of bushes made light and shadows come from all over the place.  But I realized once I had this assembled that in the pared down version the light was mainly coming from the left, so the dark/light sides of the flower pots needed to be flipped. I couldn't just turn them over, but I did wind up just painting some light and dark paint over each one.


After quilting the whole thing I had to decide how much to crop it.  My mom and I discussed it back and forth for a while but finally decided to crop a fair amount so that the kids were really front and center.  There was no need for so much empty sky and porch.  But after that was done, it felt a little small so I decided to do a portrait finish.  I've done this with several of my pieces now and I like the framing effect it gives without feeling like a traditional border on a contemporary piece.  Of course it does mean quilting a whole second quilt, but for something small like this it goes pretty quickly.  I auditioned several colors, but decided I liked the plain red best, so I quilted it to echo whatever was going on in the nearby parts of the main quilt.  As a final step I put a bit of white paint on the bubble wrap to give it some extra dimension.


And here it is all finished.  I gave it my sister for Christmas.  She really liked it and was very surprised, so I think my mission was accomplished.  It was so wonderful to be able to surprise her!

4th of July 2015, c. 2016 Shannon Conley, 31" x 35"


Have you ever done portrait quilts?  I think this one turned out pretty well, especially since I didn't have to do faces!  Thanks to Mike for taking all the final pictures.

Wednesday, January 11, 2017

I Like #1

My friend Lee Anna does weekly I Like posts which she publishes on Thursdays but adds stuff to all week.  One of my goals for 2017 is to be more positive and I think I like posts would be a good way to help do it.  I'll be back with more quilts on other days, but here's a summary of things that have been positives for me lately.

1. I like my family!  Coming off the chaos of the holidays into the very busy but much less bright flavor of January I'm reminded how lucky I am to have a family I'm so close to!  Hooray!

2.  I like blooming plants!  I don't do well with outside plants, but I love houseplants, and most of my prettiest flowers seem to come in the winter.  Right now I have a fun Christmas cactus and bromeliad blooming in my studio!


3. I like Anatomy Lab (I had a picture but this doesn't seem like the place....) !  I'm a pharmacologist and cell biologist by training, not an anatomist, but I've gotten more involved in anatomy teaching in the past year and it's so fun to work hands on with students and learn something new.

4A. I like stickers.  In common with my sense of style (which heavily emphasizes glitter and pink), my great enjoyment of stickers reminds that in many ways there is a first grader still inside me trying to escape.  My lab members will tell you there's a whole folder of fun stickers in my office and any time an experiment goes well, a sticker goes in the lab notebook.  Recently I've started jogging again with my sister, and she sent me a lovely pack of Charlie Brown stickers to put up each day that I jog.  Such a great motivator for me!

4B. I like....not jogging, but the feeling I get afterwards and the playlists I play while jogging.  The playlist I usually jog to is one I made a couple of years back and is pretty eclectic.  I pretty  much included anything I enjoyed that was peppy.  It's about five times longer than my runs, so I don't get repeats very often.  Yesterday I had, among other songs, the Fraggle Rock theme song, Regulate by Warren G, 409 by the Beach Boys, Telephone by Lady Gaga, Whose Bed Have Your Boots Been Under by Shania Twain, and the Disney Color Song.

5. I like singing!  Our church choir is small but mighty and I love traditional choral music.  I don't have a very good ear, but I can read music after many years of playing the piano.  I've been the only alto in our choir for many years, and over time I've gotten better at finding those notes in the middle of chords and I've come to appreciate the harmony that comes from choral music.

6.  I like quilting!  I know, I know- seems kind of a duh thing, but I really enjoy the quilting part of quilting.  It's especially fun when, like now, I'm quilting something through only a single layer of fabric (rather than the many piled fused layers my work sometimes has) and when my threads aren't breaking and a good playlist is on (not the jogging one).  Here's a quick look at what I've been quilting lately; much more on it later of course.  It's only shiny because I'd just sprayed it with water to start getting rid of the blue marking pen.


I hope you all have a week filled with some things you like, and many thanks to LeeAnna for suggesting this idea to me.

Monday, January 9, 2017

Christmas Quilt for Becky

Back just before Thanksgiving I decided I'd make a quilt of my niece and nephew for my sister as a surprise Christmas present.  They are so very very special to me.  I'd had this fun picture of them I took over 4th of July 2015 pinned to my wall for a long time, and figured it'd be great to interpret as a quilt.  It really captures their fun playing (popping bubble wrap) and didn't have faces, making it much easier for me! I was really sorry not to blog about this as I went along, but that's how presents often have to be!


I decided to adopt a technique I learned from Esterita Austin at IQF a couple years ago.  I'd previously used it on my seed quilt, and have found it to be an excellent way to do painted quilts.  In brief, you paint on parchment paper, cover the painted surface with mistyfuse and a layer of organza, then iron.  The paint transfers to the organza and can then be applied to a quilt or whatever.  There are two really great benefits to this approach (over simply painting fabric).  The first is that parchment paper is much easier to paint on than fabric.  The brushes slide smoothly and the paint is so much easier to apply without weird bleeding.  Second, and more important for someone like me who doesn't draw well, is that you can put the parchment paper over a photograph on a light box and use it to guide color placement (standard but important disclaimer- do not do this if you don't own rights/have permissions for the photograph).

Here's what it looks like on the light box.  You can see the printed out (full size) picture underneath and the skin I've already painted on the parchment.


I painted each section onto the parchment paper separately, doing all the skin/hair first, then the clothes/shoes, then the flower blossoms, leaves, and pots.  That way I could mix up the many different shades of blue/red/tan/whatever all at once and not have too many colors going at once.  These are all painted parchment paper.


And here's what they look like after being transferred to organza using the mistyfuse.  In the one of the kids, there's a bunch of extra organza all around the figures which I trimmed away before applying them to the background.


It was fun doing the painting until I got to the leaves (which were very tedious).  As a result, many of the leaves don't have any paint at all, but the ones that do give some depth.  Next up, making the background and assembling it all!

Friday, January 6, 2017

2016 Wrap-Up and Looking into 2017

I've really enjoyed reading the 2016 recaps and 2017 plans/goals/resolutions that abound in the blogosphere, so I thought I'd dump my thoughts into the fray.  2016 overall felt like a really hard year for me, and 2017 is going to be the same way, but I think this is about my attitude more than anything else.  Especially when I look objectively and see how many really wonderful things that happened in 2016.

On the quilting front, even though I didn't blog nearly enough, I did finish several main quilts, 3 of which belong to my ongoing "series" (in air quotes because they're sort of loosely defined), as well as lots of littler side projects.

Topography II-Crest Trail, c. 2016 Shannon Conley
Anonymous, c. 2016 Shannon Conley


Eucharistic Prayer C: Convergence, c. 2016 Shannon Conley

On Dahlias, c. 2016 Shannon Conley


Lux Venit, c. 2016 Shannon Conley
These last two are so new I haven't even blogged about them yet.  So stay tuned for more in-depth posts.

Conformational Change, c. 2016 Shannon Conley

4th of July 2015, c. 2016 Shannon Conley

Now looking forward.  I'm not much for regular resolutions but I do have some goals for 2017.
 1.  Improve my overall outlook.  I used to be a super bouncy cheerful extremely enthusiastic person.  My friends will tell you that when I get going on something I still am those things, but over the last few years I've steadily fallen into a default position of cynicism and irritation.  What a tragic way to approach things!  I kept thinking 2016 was a wretched year, and let external factors sway my emotions and attitude to an excessive degree.   I've decided though, that I can't help anything become better if I radiate negativity.  I need to actively change this attitude.  One thing I'm going to adopt is a weekly "I like" post here.  It feels like a concrete way to force myself to acknowledge good things I see and do and hear.  My good quilty friend Lee Anna has been writing these posts and I love reading about things she's enjoying.

2. Improve my productivity.  I feel like I have a lot of wasted time in my life.  I think for me, this means being intentional about how I spend my time, whether it's working, or making art, or relaxing, I need to be actively choosing how to spend that time and not looking up and suddenly realizing I've been websurfing for an hour.

3. Keep making art.  My eventual goal is to apply for Juried Artist Membership in SAQA, and for that I need a fairly large cohesive body of work.  I don't have any desire to make things just to check a box though, so the end result is I need to just keep working and see where my pieces go.

Here's fingers crossed for a productive, positive 2017!

Tuesday, January 3, 2017

Christmas Miscellany!

Happy New Year to all!  I hope everyone had a lovely time celebrating and spending time with family and friends.  We spent Christmas at home and the week after visiting family (awesome).  I have various miscellaneous projects to share from Christmas, and then two new quilts to share later in the week.  I love having a record of these small projects, it feels really fun to go back to them later and look.

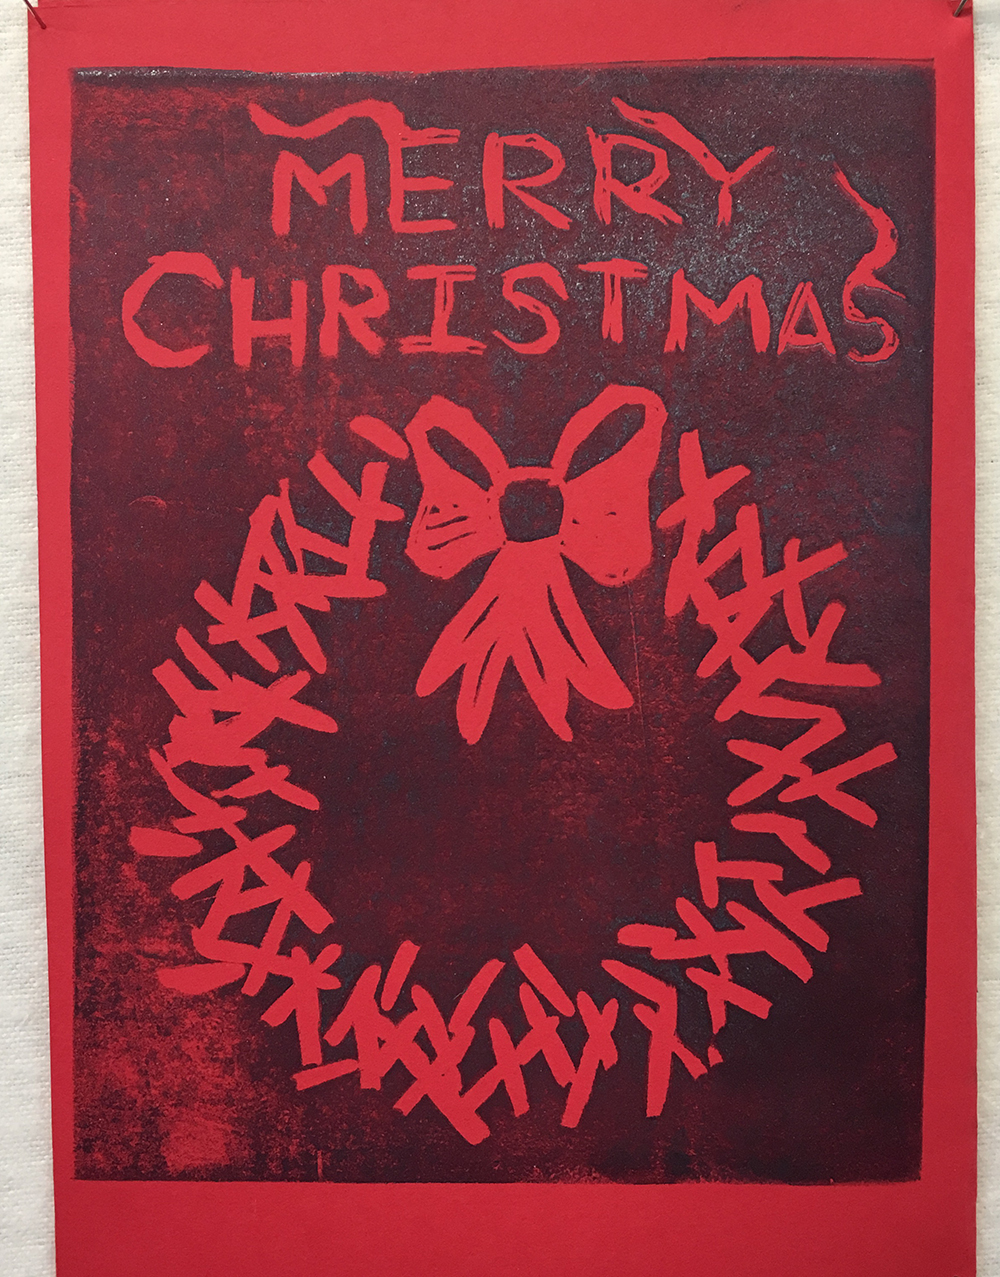
For my Christmas cards this year I used a stamp I cut during a Jean Wells Keenan workshop this past spring.  I've never done much stamping or stamp carving, but I had fun with this.  It took me a while to get the printing right, but by the end I had it going well.  It was so fun to use different brightly colored cardstock and paint colors in all different combinations!  I did miss sending out a picture, but we just didn't have any good ones from this year.  Hopefully next year we will, as I love getting family pictures from others.


Another Christmas project this year isn't really mine and has actually been going all fall, but as it was a Christmas present for someone else, I didn't want to jinx it by posting it ahead of time.  This quilt was made by my good friend Trish (my mom quilted it for her), using all fabric she saved from making clothes for her daughter back in the 80s.  It was her first quilt, so I've been advising a bit along the way.  It turned out super super awesome, and I was majorly impressed.  I warned her at the beginning that a tumbling block quilt was virtually all y-seams, but she persevered, and it's fabulous.  I don't have the dimensions but it's a generous lap size- maybe something like 55 x 75 or so.  It was so fun to hear all the stories behind all the fabrics, and I know her daughter (the recipient) loved it.  


As has been my tradition for the last few years, I made Christmas ornaments again this year for some friends and family.  I wasn't sure what to do (even though I have a pinterest board full of holiday projects to try), but after cutting paper snowflakes with my nieces and nephews at Thanksgiving I thought I'd run with that idea.  Unfortunately because I couldn't just use white paper, many of them don't look like snowflakes exactly, but it was fun cutting them.  They were smallish (I think the medallions were 3.25 inches wide), so I couldn't get as much detail in the snowflakes as I would have liked, but I think they turned out ok.  A little more crafty and less sewy than I usually do, but something a bit different.  The backgrounds are just the little wooden medallions you can get at craft stores which I painted and then decoupaged on the snowflakes using some old matte medium.  As always I made a special ornament for Mike reflecting his interest (although I don't think he particularly cares about Christmas ornaments).  This year I did one from him similar to these only with a red Jeep on it, as he's taken up Jeep off roading this year.  Unfortunately I neglected to take a picture before packing away all the decorations yesterday!  Oh well, I'll get a picture next year.


My favorites.

Finally, I wanted to share a craft project my sister did over the break!  We did bunches of crafts, especially with the kids, but I forgot to take pictures of most of them.  I thought this was especially cute and useful though.  I don't know how many of you have Candy Land aged children, but trust me when I tell you the little game pieces you move along the path are really terrible.  They're large, very light, and extremely top heavy.  As a result, they are constantly tipping over, constantly getting bumped off their places, and in short make an already fairly boring game really really painful.  So my sister decided to make these new little game pieces out of leftover buttons, felt, beads and hot glue.  At the last minute she added the googly eyes and faces, and they're adorable!  They're big enough to easily pick up for the kids, but not at all tippy, and fit well on the game squares.  The felt makes them slide really nicely over the game board, and they were so nice to play with.  It took only about fifteen minutes, and I think it would work for any game with pieces that move along a track.


That's it for Christmas crafts, I'll be back later with a 2016 wrap-up/2017 plan and then back to quilts!  


Update:  I found a picture of the Jeep ornament!!


Monday, December 19, 2016

Baby Quilt for Ava

My good friend Maggie is having a baby very soon, so of course I had to make a baby quilt for her little girl Ava.  I had a charm pack of minky squares I wanted to use but the colors didn't really go well together.  I pulled out the blue ones though to serve as inspiration.  I used all stash stuff which makes me happy and I think it turned out cute.


We're looking forward to her arrival!

Tuesday, December 13, 2016

New Christmas Quilt


On and off over the years I've seen people make quilts using antique linens (like these) and I've always admired them.  A few years ago I picked up this Christmas doily somewhere thinking it would be great for this type of treatment although I don't have any reason to think it's antique.  After seeing Cindy Needham's fabulous special exhibit of this type of quilt at IQF this year, I was determined to try my hand at it.

I tried the doily on several different green backgrounds.  I had a really hard time capturing the colors in photos, especially for the darker ones, but I settled on a very dark green dupioni silk from my stash (it's the far right that looks almost black, but in person is a lovely forest green).  After a little bit of pre-marking I just started quilting away.


I bound it in a green microsuede which gives a nice soft texture in person.  The Christmas tree I quilted in the middle felt a bit off center to me because I placed it so the widest part of the tree would sit in a wider part of the wreath, so I decided to quilt the words "Lux Venit" (the Light is coming) under it in reference to Jesus' birth on Christmas.


Lux Venit, Shannon Conley, c.2016


Happy Advent and Merry Christmas and I hope you're finding time to celebrate with those near to you this time of year!

Wednesday, December 7, 2016

New Manuscript Quilt

You may recollect I've been working on a series of quilts depicting the pieces of the Episcopal liturgy, specifically the Holy Eucharist, Rite 2.  The next section I decided to work on is the Confession.  In thinking about this piece I decided I wanted to use my own handwriting rather than a more formal script as I've used in previous pieces.

I didn't want to digitally print it, so I started thinking about ways to get my handwriting onto fabric.  At first I thought I'd try bleach discharge using a bleach pen, but on my little samples, the bleach pen bled so much that it wasn't really legible.


Next I thought about using Esterita Austin's ink/paint transfer technique.  I'd previously used it on my seed packet quilt and thought it might work here.  Basically, you can paint or write on parchment paper, layer it with misty fuse and organza and the paint/ink is picked up by the organza/misty fuse when you iron.  Previously I'd done it with paint, which worked quite well, but for the handwriting I wanted to use marker as I'm not very graceful writing with a brush.  I did some sharpie writing on the parchment (top picture), and then did the mistyfuse transfer onto organza (middle picture).  It worked fine, but because the misty fuse has the texture of a fine webbing and the marker ink doesn't have any inherent structure to it (like a layer of paint), the ink only transfers exactly where the misty fuse fibers were.  This resulted in a sort of faint transfer which wasn't exactly what I was going for.  I tried it using wonder under instead of misty fuse since that's a little denser, but it really didn't work (bottom picture); I just got a big mess.


Next I decided to try sunprinting.  I purchased some Jacquard SolarFast, a sunprinting fluid that allows you to print in many different colors, not just the blue of traditional cyanotypes.  I got a bottle of purple and a bottle of orange.  You paint it on, then while wet, put on your items for resist, cover them with glass, and put them in the sun.  Many people print black and white photos on transparencies and place those under the glass for printing, so I figured I could write with a black marker and that would work.  I did two small test pieces on different background fabrics.  For one (Alleluia Alleluia below) I used a standard sharpie and wrote on the transparency.  For the other (Go in Peace below), I wrote with standard sharpie directly on my glass.  The two pictures are just different amounts of time in the sun so you can see the color develop.  Writing on the glass was easier since it meant only positioning one thing, but I was concerned that because the writing was on the top of the glass, the thickness of the glass might make the writing less crisp.


Indeed that's what happened.  Sorry for the terrible lighting below, I'm not sure why I had so much reflected light off these samples.  Anyway, you can see that the writing is definitely crisper and easier to read in the Alleluia sample than the Go in Peace sample.  In fact on the Go in Peace sample, you can hardly even see the words, especially on the purple.


I decided to use orange for the center of my print (where most of the writing would be) and purple for the outside ring since the writing was easier to see on the purple.  I did like the look of the purple and orange on the light yellow print background, so I grabbed another piece of light yellow tone-on-tone from my stash.  I also decided to go ahead and write on the transparency rather than the glass and use a thicker marker.  The final size of my print is about 30 x 30 so that meant a large piece of glass, transparency, and fabric to line up.  It was a bit tricky lining it all up in the dark, and then my giant sheet of glass broke in two leaving some very sharp edges, but in the end I got it all layered up and into the sun.  Here it is mid-print.  The thing that looks like a white string across the top is actually the place where the glass broke.  I had to hold it together with clear packing tape.  If you look closely you can see the transparencies underneath (where the writing is).  The little whitish squares are the scotch tape I used to hold the transparency sheets together.  Unfortunately you can't use the transparencies without the glass overlays because they blow away. 


 Here's how the final print turned out.  I like it- the text is subtle, but legible if you look very closely, which is fine with me.  I have great plans for how I want to turn this into a quilt, but sadly there are a few more high-priority things in the pipeline right now so it'll be the first of the year or later when I get back to this.


What kind of experiences have you had with these techniques?