Excitingly, in the October/November 2011 issue of Quilting Arts we found an article on easy make-your-own silk screens by Enid Gjelten Weichselbaum. Basically, you take a piece of iron-on vinyl and cut your desired pattern out of it then attach it to a piece of organza. There's really nothing more to it; we did put masking tape around the edges but that was it. Squirt a little silk screen paint on it and squeegee away with a credit card. We used plaid silk-screen paints as well as setacolor fabric paints thickened with a little bit of sodium alginate. We did find the process worked best with small screens (smaller than about 5x7); any larger and the prints weren't as clear because the organza was really floppy. I think for bigger prints it would be better to have the organza on stretcher bars as in traditional silk screening. This technique was really fun and easy though for small screens and printing!
Here's one of my first screens and the initial test prints we made on muslin. We made our screens on purple organza because it was on sale, it didn't seem to matter any in terms of the print quality.
I initially made two screens vaguely inspired by my bathroom wallpaper, and I decided to make a medallion pattern with them. We initially tested on muslin, but I printed my medallion on some sort of pre-washed white-with-green sprinkles batik I found in my mom's stash. Here are a few shots in progress. The blue lines are water soluble marker I used just to line up the medallion wedges.

Here's my final medallion. I discovered that you can easily tape over some parts of the screen if you just want to print one section of it as I did with the outer green tear drop shapes. I'm not sure what I'm going to do with this; incorporate it into some art quilt I'm sure. It reminds me of spring though and I'm pleased with how it turned out.

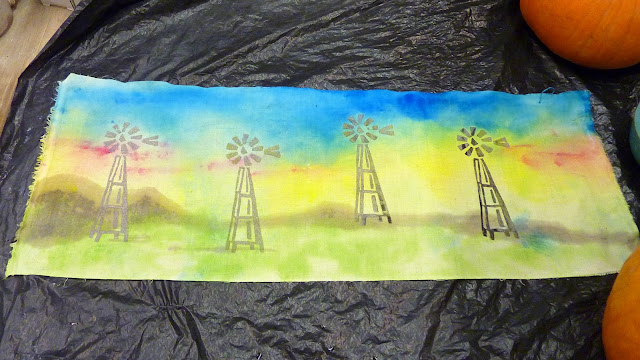
My mom did a windmill screen the first day. She has some ongoing windmill projects incorporating both traditional an modern windmills. Here are a couple of the things she printed. In the first one she's going to applique a large modern windmill in the foreground. This was standard printed fabric and the screen printing worked fine. In the second one she was experimenting with painting the background with setacolor after screen printing. The screen printed images acted like a resist and weren't covered with the background paint.
Finally, my sister asked for a printed bib for the baby, so we tried screen printing on the knit/terrycloth fabric that little bibs are made out of. It worked just fine!
We had so much fun the first day, both of us made more screens the second day. My mom made a bunch of different sized leaves and printed them on some fabric she'd previously hand-dyed. I forgot to take pictures of it; it looked really cool, but that was how we learned that the larger screens didn't work as well. The larger leaves got kind of blobby and didn't print as crisply.
The second day, I used a piece of commercially printed fabric which had a subtle brown-pink-blue rose pattern and some little white specks on top. Before I printed on it, I painted the background with setacolor paints. The little white speckles acted as a resist and showed up on top of the painted surface. I then made a bunch of quail screens and printed a whole family of quail. I'm not quite as crazy about this one as the medallion, but the quail are fun.
This was a super fun project, much less messy than typical dyeing projects although you do have to have a sink to rinse the screens. They can be reused multiple times and the technique was very easy. Here are my mom and I mid-laugh; you can tell by the silly picture that we were having fun!
I encourage you to snag a copy of the magazine and try it out! Anybody else do fun-easy surface design techniques lately?
Linking up with Works in Progress Wednesday, maybe the great ladies over there will have some suggestions for what to do with these dyed panels!


Yay, I like the quail the best. I can't wait to see what you guys do with all these fun fabrics!
ReplyDeleteSo, so cool! Can't wait to try it!
ReplyDelete